Having your own body of water to plunge into on a hot day is the dream of almost every summer resident. To some it seems impracticable, but others get down to business and prove that nothing is impossible. To help the latter, we will tell you how to make a pool with your own hands and provide step-by-step instructions for this process.
Types of pools
There are four types of pools suitable for use in the country:
- inflatable. Almost everyone is familiar with them, since they have probably seen children splashing in such rubberized baths more than once. However, now manufacturers also produce large pools with a displacement of several tons.
Among the advantages of this type, it is worth noting that it is cheap and easy to transport (when folded, they fit into the trunk of a car), and the disadvantages are fragility and susceptibility to mechanical damage;
- frame. Prefabricated structures, easy to install, and therefore quite transportable. They last longer than inflatable models, but their price is also higher.
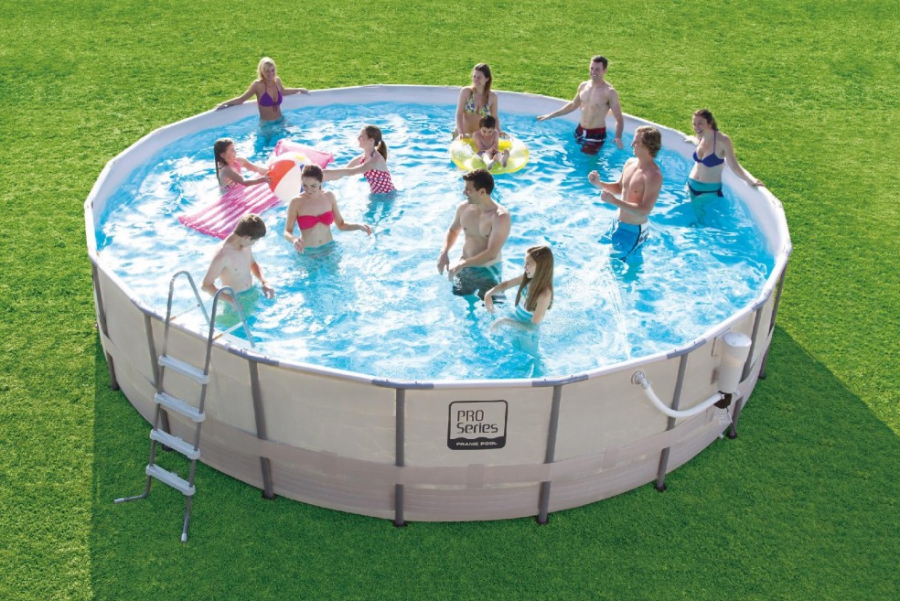
Assembly and dismantling of such a pool does not cause difficulties, and they are less susceptible to mechanical damage. But like any mobile structure, frame pools are not durable;
- propylene. They are a bowl made of polypropylene and filled with water. They are characterized by good waterproofing, long service life and ease of installation.

Disadvantages include the high cost and difficulty of delivery, since most often the bowl is purchased ready-made;
- foundation pits Pools poured from concrete in a pre-dug pit. Their construction is a rather labor-intensive process, but this pool on site is difficult to damage, and with proper care it will last for decades.

If you undertake to build it yourself, you will succeed inexpensive pool, but at the same time durable and easy to use. It is difficult to make such a country pool with your own hands, but it is possible. We will tell you how later.
Choosing a pool location
When choosing a site to place a pool, follow these recommendations:
- Locate the pool away from trees. Their roots can damage the waterproofing and create water leaks, and the foliage will add to the work of cleaning the bowl from debris;
- the groundwater level under the pool must exceed 1 meter, otherwise they may come to the surface, and together with the artificial one you will have a natural reservoir resembling a swamp;
- give preference to an area with clay soil. Clay does not allow moisture to pass through well and will provide additional waterproofing;
- consider the wind rose. The wind carries debris, so build your pool so that you have access to an area where this debris will accumulate.
How to make a pool with your own hands?
And now the promised step-by-step instructions, how to build a country pool with your own hands.
1. Develop a preliminary project, which should take into account the location of the pool (we wrote about it above), the shape and size of the bowl and the supply of communications (water intake and drainage).
2. Mark boundaries. Using a tape measure, pegs and rope (twine), mark the area.
3. Dig a pit. Its length, width and depth should be about half a meter larger than the design ones, the walls should have an outward slope of 5-6°, and the bottom should be inclined to one side by 5°.

4. Level and compact the bottom, then fill it with a 30-centimeter layer of sand or crushed stone and lay two rows of roofing felt on top with bitumen mastic, thus providing waterproofing for your pool.

5. Make formwork from wooden beams and boards. To strengthen and strengthen the structure, use reinforcement: rods with a diameter of 4-8 mm are suitable.

6. Fill the hydraulic concrete, having previously installed the water supply pipe and drain. If there is no hydraulic concrete, use cement (grade C500) mixed with sand in a 2:1 ratio. When you remove the formwork, treat the walls with cement laitance, applying it with a brush.

7. Line the pool. PVC film for swimming pools, tiles, and mosaics are suitable.

All that remains is to landscape the remaining area, which our article “10 budget ideas to make your garden picturesque” will help you with, and enjoy your vacation.
We hope that with our instructions, making a pool with your own hands at the dacha will not be difficult. If you still doubt your capabilities, then take on a simpler frame version of a country pond:
How to make a pool with your own hands - learn the 4 stages of construction: site requirements + 3 types of structures + 5 components of the pool walls + bonus - 3 best design ideas.
Are you tired of relaxing at your dacha and dreaming of Turkey or Egypt, for which you don’t have enough money or time?
Build your own swimming pool and add a touch of exclusivity to your holiday.
You can feel like a wealthy person with the help of simple things. Having your own pool at the dacha brings a lot of pleasure and gives your vacation a different status.
Worried about your own health? Go swimming. A swimming pool is not only an indicator of status. This is also the place where your children will relax and where your parents will keep themselves in good shape.
Don't worry that you don't know how to make a swimming pool at your dacha, in a bathhouse or sauna, in the courtyard of a private house. The article contains all the information you need.
Take some of your time, study the theory, get inspired by the best designs - get truly valuable advice.
How to make a pool with your own hands?
At first glance, the reader is given an impossible task - to make a pool with his own hands. But not everything is as complicated as it might seem.
With proper preparation, you can build an exclusive pond within a few months that will last for many years.
Why do you need to build a pool yourself, rather than entrust it to intermediaries?
- First of all, this is a significant saving.
- You will study theoretical material and know how to make a truly high-quality pool.
- You will be able to control every detail of the process, right down to the design.
- And most importantly, in the end you will be able to create a comfortable vacation spot that you will be truly proud of.
It's time to start a concrete plan for design and further construction!
How to make a pool in a bathhouse or in a summer cottage: 4 stages
Stage No. 1: Determine the place where you should build a pool.
The first step is the most responsible and important; the future fate of the project depends on it. To correctly determine the location for a pool, you need to have some knowledge of geology.
The best base for a pool is sandy soil with clay admixtures.
Why is it worth making a pool on clay soil?
- Clay serves as additional waterproofing.
- This type of soil lends itself better to grader work and is one of the most stable. You can be sure that one day the bottom of the reservoir will not crack.
- Protection from high levels of ground moisture. Waterproofing allows you to protect the concrete base from the influence of water, which will create a suitable microclimate for the long-term service of the pool.
Also, when choosing a site, pay attention to the following secondary factors:
| Factor | Required indicator |
|---|---|
Rose of Wind | The pool should be made in a place where there are no direct wind flows. For example, if you have a free area behind your house and it is surrounded by a fence, this is a suitable area. |
Sunny side | If the pool is equipped with an artificial heating system, this issue ceases to be relevant. But in the case when you rely on the sun's rays, it is more logical to do it in a bright area where there are no trees or other obstacles to high-quality lighting. |
Safety | If the depth of the reservoir is more than 1.5 meters and you have small children, you need to take care of their safety. Make a small fence around the site. |
And now you have found a suitable location where you can make a pool: ideal soil, high light, windless side of the site. Obviously, if you decide to make a structure indoors, you skip this point.
It's time to start practical work.
Stage No. 2: Designing a pool, working on the foundation pit.
For proper design, you need to know the main types of pool designs:

Is it difficult for you to decide on a suitable design? The main advice when choosing the type of pool is to decide on the purpose:
- If your goal is to learn to swim, there is only one option - a stationary pool.
- An inflatable structure is suitable for children's entertainment in the hot season, as it is easy to install and safer due to its elastic base.
- A foam party with friends requires more space than regular children's entertainment - a frame pool is ideal for a small group of people to relax in the summer.
The most versatile option is a stationary pool. But it is worth considering some details, namely the design of the bowl:

The best and most reliable option is a stationary pool with a concrete bowl.
How to make a pool yourself: designing a pit
After choosing, it is worth marking the plan of the pit for the bowl. In the case of concrete bottom laying, you can think freely in terms of size.
For example, you had a desire to build a pool with a length of 8, a width of 5 and a depth of 2.5 m. If the question was about installing an already purchased polypropylene bowl, the size of the pit would depend entirely on its parameters.
The concrete bowl gives freedom of design, which is an important advantage.
How to make a pit? Step by step guide.

A very important point is the correct marking of the area for technical work. Use flags, placing them along the contour of the future pool. The walls of the pit should have a slight slope to avoid ground collapses.
Important! Consider the thickness of the wall cladding (sand, concrete, waterproofing).
When planning, take this important factor into account and expand the initial contours by 15 - 30 cm.
Also pay attention to the future drainage system, if it will be bottom and provides for a pipe outlet - think about this in advance.
Usually, this problem is solved by a slight bottom slope and proper planning of the drainage system.
Separately, it is worth considering laying the bottom of the pit.
All actions are motivated by maximum waterproofing of the pool, since it is impossible to be completely confident in the complete solidity of the structure.
Of course, a concrete bowl is very reliable, but still additional safety measures will not be superfluous:
- Primary waterproofing is soil compaction. After the main earthworks, it is worth doing the initial compaction of the walls and bottom.
- The second stage is to fill the bottom with sand and gravel. Sand layer – 15–20 cm + 10 cm of gravel.
After completing all the excavation work, it is worth smoothly moving on to pouring the main layer of the bowl.
Stage No. 3: How to make a pool: forming a bowl.
Time to move on to the most difficult stage - the correct formation of the pool bowl.
To begin with, we should consider the general plan for constructing such structures. If you are sure that it is enough to fill the walls with concrete and the bowl will acquire ideal waterproofing and strength, this is a little inconsistent with reality.
Everything is much more complicated, which is why it is necessary to consider the structure of the pool walls in more detail:

| Component | Purpose, rules for constructing a layer |
|---|---|
Compacted soil, crushed stone and sand | The main goal is to build the correct base and drainage layer under the remaining components of the waterproofing membrane. |
Lean concrete with reinforcement | 80 mm of concrete forms an initial barrier to water. The solution must be prepared based on the characteristics of the soil. More precisely, you should pay attention to the percentage of moisture. The use of reinforced mesh is mandatory. |
Waterproofing | There are a lot of composition options; polymer materials are best suited, from PVC film to polypropylene boards. |
Base – 20 cm layer of concrete | The reinforced concrete layer should become a solid foundation for the entire structure. It should be poured at the same time to avoid the formation of cold seams - places where concrete meets from earlier and later pouring. |
Tile finish or polypropylene bowl | The last layer is the tile finish. It has a number of advantages compared to a polypropylene bowl. You just have to lay the tiles with waterproofing adhesive and carefully process the seams. |
Stage 4: Home stretch – landscape design.
All that remains is to create a recreation area.How to choose the right landscape solution for a swimming pool? A difficult question, because there are a lot of ideas for original design. You can see the best of them below.
1) “Green frame”

Interesting approach to design, perfect for floristry lovers.
If your goal is to relax in the countryside from the bustle of the city, then choosing a better option is simply impossible. The difficulty lies in constantly maintaining the condition of the lawn.
The disadvantages of this solution are seasonality. You will not be able to maintain a constant microclimate near the pool. But we must not forget about the beauty that you will receive with the onset of spring!
2) “Concrete jungle”

The main idea of the design is to make the place comfortable and convenient. A canopy allows you to create your own special microclimate, raise or lower the temperature, and protect from the wind.
The shore is tiled, the main focus should be on the pool, all other elements of the landscape are minimalist.
The name is chosen in accordance with maximum convenience and practicality, which evokes an urban atmosphere.
3) "Zen"

The design is influenced by oriental style. Its features include:
Peace.
All details are subject to the ideology of calm. Some monotony is diluted with a pleasant glow and plants.
Individuality.
This pool is ideal for comfortable relaxation - it is separated from the outside world.
The implementation of this design option requires large-scale investments, which is why it is not suitable for everyone. But if you have the opportunity to make a financial injection into your comfort, do it.
4) “Swimming pool in the bathhouse”

But when you are thinking about how to make a pool in a bathhouse, the main design option is decor with mosaics or tiles.
The decision is up to you - to build an entire composition or limit yourself to a single pool.
The demonstrated design options give a reason to think about your own project and evaluate it from a different perspective.
Making a pool with your own hands is not at all difficult! The main thing is to approach it wisely.
Watch the video and learn from the mistakes of others so as not to make your own:
Did you find out how to make a pool yourself. Is it worth taking on such a complex project? That's another question. If you are confident in your strengths and capabilities, get up from your chair and start moving towards your dreams.
Your standard of living is determined not only by the number of bills in your wallet, but also by the ability to use your skills in the right direction.
Useful article? Don't miss new ones!
Enter your email and receive new articles by email
What could be better than swimming in your own pool in the summer heat? Only a vacation at a resort, which will require you to spend a lot of money, and often nerves.
It is especially beneficial to have a body of water “nearby” for very busy people who have the opportunity to devote very little time to rest. And for children such pleasant and useful entertainment as wallowing and swimming will be a real gift.
Decide on the type of pond

Before you make a pool in your garden, think about what you expect from the design - decorative or practical.
- A pond as a landscape decoration. It’s good to meditate near it or enjoy the coolness while having a get-together. Decorative carps will revive and add naturalness. But it’s unlikely that you’ll be able to swim in something like this – you’ll scare away the fish and stir up turbidity. So this idea is more for visual rather than tactile joy.
- Capital stationary analogue. This is already a serious design, good for those who live in a house or country house permanently or for a long time.
Note!
Proper installation and well-placed communications will make you forget about silting and constant “blooming” of water.
Of course, the price for pleasure is considerable, but you don’t have to be afraid of picking up fungus and other infections.
The water will be perfectly clean, and the maintenance of the pool will be minimal.

- Mobile plastic garden pool is convenient for summer residents. You can make it buried (that is, dug into the ground), or you can place it on a leveled area.
The last option is desirable if you have small children. High sides will prevent them from falling into the water. But the edges at ground level will require increased attention, because even an adult could accidentally fall into such a bath. - Inflatable mini-pools, popularly called “paddling pools”. Children have to be pulled out of them literally with a scandal; water procedures in the summer are their favorite pastime. In the store you can also choose a fairly large inflatable bath for adults. The pool is also convenient because at the end of the season it can be easily deflated and stored in the pantry.
- Prefabricated bathing frame structures. For seasonal use they are almost ideal. Even a non-professional can assemble and disassemble the pool; it is enough to follow the sequence recommended by the instructions. Affordable cost, mobility and variety of shapes add advantages.
How to make a flood pool

Self-implementation will allow you not only to save money, but also to realize your creative idea to the fullest.
Construction works
- Come up with the shape of the reservoir and decide on the size. It is very useful to make a sketch after discussing all the nuances with your family.
- Select a location. The site should be well lit, this helps the water warm up in the sun. If the place is chosen correctly, the water in the pool will be like fresh milk by the evening.

- Clean and level the area for the future structure and make markings.
Note!
The width and depth of the pit is made larger than the future structure by 40–50 cm.
This is a reserve for the insulating and concrete layers.
- The bottom of the pit is covered with a sand layer of about 15 cm and thoroughly compacted.
- Roofing material is suitable as waterproofing. It is advisable to make the joints overlap, then fill them with bitumen.
- At this stage, all communications, water supply and drainage are installed. If desired, a filter with a pump is installed.

- Next, you can make the formwork and lay the reinforcement cage.
- The walls of the pool are poured first, leaving the bottom for last. It is better to carry out concreting in stages, laying reinforcing bars before laying the concrete solution.
- A drain pipe with a tap is installed at the bottom in a convenient place. If it is discharged into the general sewer system, a trench is dug in advance with a slight slope away from the pool. For forced pumping, you will need a pump; you can easily install it yourself, following the instructions.

- A small layer of gravel is poured onto the floor, directly onto the roofing felt, and a reinforcing mesh is laid.
- You can fill the bottom with concrete mixture, not forgetting about the slope towards the drain hole.
- The finished box is leveled with plaster and allowed to dry for 28 days (according to the standard, it is during this period that the concrete stone completely crystallizes).
Finishing of the building

Your pool now needs finishing to give it a finished appearance and working order.
- Economy class option - decoration with special waterproof plaster. The process is quick and inexpensive, but the effect will not be so impressive.
- The most popular material is majolica, small mosaic tiles on a mesh base. It is easy to install, you can create an endless variety of color options and pattern combinations.
- Another good option is finishing with special waterproof ceramic tiles. Difficulties may arise if the shape of the pool is complex, you will have to cut and adjust fragments. This is unprofitable if the tiles are large, there will be a lot of waste.
- Decorating with marble will add solidity to the bathhouse. But the pleasure is not cheap, since it will also require workers with special equipment.
- Upon completion, the seams between the tiles are rubbed with a waterproof fugue.
- After drying, it is recommended to wash the pool with household detergent, only now it is ready for full use.
Assembly and care of the frame analogue

Anyone who doesn’t want to bother with sand and cement, as well as waste time on finishing work, can be advised to buy a prefabricated pond with a frame.
- Before building a structure on the site, carefully read the attached instructions. Pools of different shapes and models can be assembled in different ways.
- Prepare the site before assembly and installation. Leveling for the stability of the reservoir is mandatory. Try to choose a sunny, windless area.
- Don't forget about adapters for connecting pipes.

- Keep in mind that the bathhouse can not be dismantled for the winter season, this is a tangible plus. But at the end of the season, it is advisable to cover the container with film.
- Many manufacturers offer accessories for heating water. Convenience will cost more, but you can take water treatments almost all year round.
- If desired, a mobile pool can be installed indoors. The main thing is that the area allows.
- It is necessary to take care of it, just like its stationary counterpart. After draining the water, the walls and bottom are washed well with household products.
Note!
With proper installation and regular maintenance, the structure will last up to 10 years.
Among the disadvantages, we can note the shallow depth and the appearance is not as attractive as that of a stationary pool.
Conclusion
It is possible to realize the dream of having your own mini-resort in the garden even with a small investment. Just don’t put off this idea, but start right now, at least with a sketch and preparation.
The video in this article offers a lot of interesting things; the original ones will definitely inspire you.

During the hot season, it is always nice to spend time in cool water. But it may not always be possible to go to a river or other body of water. In this case, the best option would be to build a swimming pool at your dacha or on the site of a country house. You will always have your own pond at hand where you can relax. In this article we will talk about how you can inexpensively make a pool in your country house.
Types of designs
Before answering the question of how to build a swimming pool at your dacha with your own hands, you must decide on the type of structure itself. The choice of material and work technology will depend on this. As an option we can offer the following types of pools:
- Frame. Such designs can be purchased ready-made. A frame pool is a metal structure with a stretched fabric (usually PVC film). The kit may include a ladder, cleaning system, pumping station, etc. This design is installed for the season. The pool is already equipped with waterproofing; you just need to assemble the structure and pump water into it;
- Plastic products. This option is a bowl made of polymer materials. The container can be purchased ready-made or ordered from a specialized company. Similar models, like the previous version, are installed for the season. It is better not to leave a plastic container for the winter;
- Stationary. This type can be considered a real pool. Of course, its creation will require a lot of physical and financial effort from you, but as a result, a large body of water will appear in your dacha or garden plot where you can swim.
One of the options can be considered inflatable structures. But such pools are not so comfortable due to their small size. And the quality of inflatable structures is often poor. Having pumped up the pool in the evening, in the morning you may find in its place a piece of rubberized material lying helplessly on the ground.
Choosing the optimal size and location
Since it is the stationary pool that can be considered “real,” then further discussion will focus on this option. If you have decided on the type, then you should think about the installation location and the size of the artificial reservoir itself.
The choice of location largely depends on the wishes of the owner. Many people install a pool behind the house, near the recreation area. But when choosing a place it is important take some factors into account. Namely:
- Priming. Much will depend on its properties. Firstly, it is better that the soil is clay. In this case, you will receive additional natural waterproofing. Secondly, when creating a permanent pool, you will have to dig a pit. If the selected area has rocky soil, then the work can be quite complex and time-consuming, especially if you do it yourself;
- Predominant wind direction. Since the pool will be located in an open area, there is a high probability of various debris getting into it. So that when swimming you do not encounter debris from scraps of paper or dry leaves, it is better that the artificial pond is protected from the prevailing wind direction;
- Presence of nearby vegetation. It is better that there are no bushes and especially trees near the reservoir. Plants are always drawn to moisture, and their roots are quite strong and can easily break through the concrete thicket of the pool.
If we are talking about the size of an artificial reservoir, then there are no special requirements. Everything will depend on the availability of free land and your preferences. For example, for swimming along one lane it is quite suitable width two and a half meters and a length of 5 meters. If there are two tracks, then the width increases to 4 meters.
The optimal depth of the pool can be considered 1.4 meters. But even here everything will depend on the purposes for which you are building a reservoir. If you have children and the main purpose of the pool will be to entertain them, then you should not make it too deep. Conversely, if you are a diving enthusiast, then depth will play a very important role.
Stages of pool construction
In general terms, the process of constructing a permanent pool can be broken down into the following stages:
- Selecting the type of reservoir and drawing up its design. At the same time, a suitable site for construction is selected.
- Marking on the ground. Excavation.
- Arranging formwork and pouring the pool bowl.
- Applying a waterproofing layer to the surface and finishing the bowl.
- Equipping the pool with equipment and lighting.
As you can see, there is a lot of work. Moreover, each stage is important, because not only the appearance of the structure and the duration of its operation will depend on it.
Excavation and bowl creation
Now let's move on to considering the question itself - how to make a pool with your own hands. When you have decided on the size and installation location, then Let's start excavation work. First of all, we apply markings to the area. To do this, you can use pegs and a stretched rope.
Next, we move on to excavation work. This is one of the most labor-intensive stages of construction. You have to dig a pit of the required size and depth. It is worth considering that the width, length and depth must be made approximately half a meter larger. This additional space is necessary for the installation of formwork. If the size of the pool you are planning is quite impressive, then you should think about using special equipment.
After the pit is ready, you can start creating the bowl future pool. This stage of work includes the following activities:
- The bottom and walls of the pit are carefully compacted.
- A pillow is made from sand. To do this, a layer of material 20-30 cm thick is poured onto the bottom and compacted thoroughly.
- A waterproofing layer is applied over the cushion at the bottom and over the entire surface of the walls. Today on the market you can find many materials that become an excellent barrier to water. The use of roofing felt and bitumen mass can be considered the most budget-friendly. Such materials have been used for a long time and have proven themselves well. A layer of roofing material is laid over the entire surface (on the bottom and walls, the latter should be covered with material to the very top with a margin). Then several (preferably 3-4) layers of bitumen mass are applied.
- The next step will be the installation of the drainage system. This must be done before installing the formwork. How many drain holes to make and where to place them will depend on the size and shape of the pool bowl.
- Next, we install the formwork, which can be made from scrap materials. After installing the formwork, we begin pouring concrete. In this case, it is necessary to use reinforcement. In order for the bowl to serve for a long time, it is necessary to use concrete of the appropriate grade and with additives.
After the concrete mass hardens the formwork is removed. Next, you need to treat the entire surface of the resulting bowl with a solution of concrete and water or iron it. At this point, the main stages of creating a pool can be considered complete. Next comes the finishing and equipping of the structure.
Finishing and lighting
 Now you need to finish the pool bowl. But before this, an additional layer of waterproofing is applied. It is very important to seal every crack to prevent water from damaging the bowl. For these purposes you can use impregnating materials, film or mastic.
After waterproofing, you can begin finishing work. Ceramic tiles are most often used to cover the pool bowl. This material can easily withstand prolonged exposure to water, is easy to clean and has an attractive appearance.
In addition to ceramic tiles, you can also use modern materials, for example, PVC film. Modern manufacturers produce a wide range of similar materials. It is strong and durable. And if we talk about colors and patterns, then there is always plenty to choose from.
The finishing work itself can be completed, but it is better to equip the pool additional equipment. This kit usually includes:

Don’t forget to arrange the area around the new artificial pond. As a rule, it is also covered with ceramic tiles. But here it is important to choose an option with an anti-slip coating. This way you will reduce the risk of injury.
As a conclusion
A swimming pool in a country house or on a personal plot is a great place to relax on hot summer days. And making it with your own hands is not so difficult. You can build an artificial pond from scrap materials, but it is better and more reliable to make it from concrete. Make calculations, make markings, dig a pit, fill the bowl and finish. Here are the main stages of work. With a little effort and financial investment, you will have a wonderful vacation spot for the whole family.
Evgeniy Sedov
When your hands grow from the right place, life is more fun :)
Content
If there is no body of water very close to your dacha or country house where you can swim for pleasure, it doesn’t matter. If you wish, you can easily make your own swimming pool in your yard. Its construction will be inexpensive, and all necessary work will be completed quickly, subject to the required technology.
Is it possible to build a swimming pool with your own hands?
Modern materials and technologies make it possible to build stationary swimming ponds with your own hands. In this case, the size of the plots allocated for construction work does not matter. If you want to make a small or large pool at your dacha with your own hands, you can make it round, rectangular, oval or any other shape, with a platform, composite structures, stairs, or a waterfall.
Bathhouses, covered pavilions, and gazebos are very often erected next to an artificial reservoir in dacha yards. It is not at all necessary to make a pool outside. If there is free space in a country house, it is quite possible to install an artificial reservoir in it. In this case, the owner of the site receives a small indoor pool, in which you can swim at any time of the year. To make a pool at your dacha with your own hands, you use different building materials. An artificial pond can be wooden, plastic, polypropylene, concrete.
Selecting a location
Building a swimming pool with your own hands at your dacha begins with selecting a suitable site where all the necessary activities will be carried out. Which location is best suited for subsequent construction:
- sunny, in which case the water will warm up well;
- conveniently located, at the highest level of the summer cottage, in this case there will be no need to install additional drainage equipment;
- remote from the garden, vegetable garden and large trees, this will prevent the falling of leaves and branches;
- located in close proximity to all necessary communications;
- on clay soil, this will keep the water in the pool at the same level.

Preparation
A suitable place to build a swimming pool at your dacha with your own hands has been chosen correctly. It's time to start doing the preparatory work. So where to start? From cleaning the area from debris, foreign objects, etc. Then, in the area where the structure will be erected, the top vegetative layer of soil is removed, low-lying areas are filled with sand or soil, compacted, and markings are made using pegs and twine. After all the above activities, you can begin the most important process - digging a pit.
Construction stages
A swimming pool in a dacha must be built strictly according to the technology provided, taking into account all the above rules and recommendations, otherwise the structure will be short-lived and require expensive care and maintenance. Instructions for building a swimming pool:
- the first stage is the development of project documentation;
- the second stage – marking the territory;
- the third stage is digging a pit (an important point: its walls should have a slope of 20 - 25 degrees, this will prevent the soil from crumbling, ensure the strength of the walls, the size and depth of the pit should be greater than the size of the future structure);
- the fourth stage is leveling, then carefully compacting the bottom and walls of the pit (an important condition: the bottom of the future structure should be located slightly at a slope to the drainage hole);
- fifth stage - laying all the necessary drainage and bulk communications;
- sixth stage - construction of the bowl;
- seventh stage - finishing the walls and bottom of the pool;
- the eighth stage - installation of filters, supply, heating, water drainage systems, disinfection devices, pumps, ozonizer, and lighting.

DIY pool made of polypropylene and polystyrene foam
Artificial reservoirs made from these materials are in demand because they are cheap, easy to repair and maintain, are quickly and easily erected, do not require painstaking maintenance, have a modern and aesthetic appearance, and are resistant to high and low temperatures. How to make a pool at your dacha with your own hands from polystyrene foam or polypropylene? Step-by-step instruction:
- Preparation of necessary materials and tools. To work, you will need polypropylene or expanded polystyrene in sheets, a rod made of polypropylene or expanded polystyrene, a soldering iron with nozzles, a jigsaw or saw.
- Preparation for installation of the pool thicket. First, a drawing of the future structure is drawn up, then the steps are displayed in the form of a diagram.
- Preparing the pit. A hole is dug, the parameters of which are slightly larger than the parameters of the future structure.
- Completing the base of the pool. Using a soldering iron, pre-prepared sheets of polystyrene foam or polypropylene are welded, laid on the bottom of the pit, after which the outline of the bowl is drawn on the base. The sheet is cut out and welded on the outside along the marked contour.
- Construction of steps. The joints of the steps are welded from the inside, followed by the use of polypropylene rod. From the outside, welding is done with a seam attachment. The completed structure is welded to the side of the bowl.
- Fixing stiffeners. Reinforcing elements are welded in increments of approximately 60 centimeters.
- Insulation of walls with polystyrene foam or polystyrene foam.

How to make a pool with your own hands
A ready-made artificial pond made of concrete or concrete blocks is a practical, cost-effective and simple solution. Such a DIY pool for a summer residence has an affordable price, a long service life, and does not require the use of expensive equipment for its construction. How to build a pool from concrete or concrete blocks?
Made from concrete
Step-by-step instruction:
- drawing up a drawing indicating the shape and parameters of the structure;
- marking the site for construction;
- earthworks involving digging a pit, compacting the walls and bottom;
- covering the bottom with a waterproofing layer;
- installation of formwork and pouring of concrete walls;
- reinforcing the walls of the structure and filling the bottom with concrete.
Made from concrete blocks
Step-by-step instructions for carrying out the work:
- territory marking;
- preparing the pit and filling its bottom with concrete;
- laying walls with concrete blocks followed by reinforcement;
- installation of stairs into the wall;
- finishing concrete blocks with a layer of waterproofing;
- installation of necessary equipment;
- finishing the structure in any convenient way.

DIY frame pool
An artificial reservoir of this kind has its advantages. The main thing is that the structure is durable, resistant to mechanical damage, low and high temperatures, and is easy and quick to install. A frame pool on a site is built with your own hands as follows:
- a pit is dug slightly larger than the future structure, filled with sand and gravel no more than 20 cm thick, and compacted;
- a concrete pad up to 20 cm thick is made;
- the walls are strengthened with brickwork to eliminate pressure on the frame;
- A swimming pool is being installed at the dacha and the area is being landscaped.
Decorative pool for a summer residence
How to build such a structure on the territory of a country house? Step-by-step instruction:
- a drawing is being developed indicating the main parameters of the future design;
- the necessary tools and materials are selected;
- a pit is dug, the bottom of which is covered with gravel and sand;
- a concrete pad is placed on the waterproofing layer;
- The walls and bottom of the decorative pool are finished with suitable materials - natural stone, tiles, mosaics, special film.