Easy to process, warm and inexpensive, aerated concrete is increasingly used both for construction and for the installation of internal partitions. In this article we will talk about the types of gas and foam concrete, the differences between them, the scope of application and the main technical characteristics.
Strengths and weaknesses of aerated concrete
Cellular or lightweight concrete (aerated concrete, foam concrete) is a dense, homogeneous material, the density of which is very low due to the large number of small (1-3 mm) pores formed during foaming and molding of blanks.
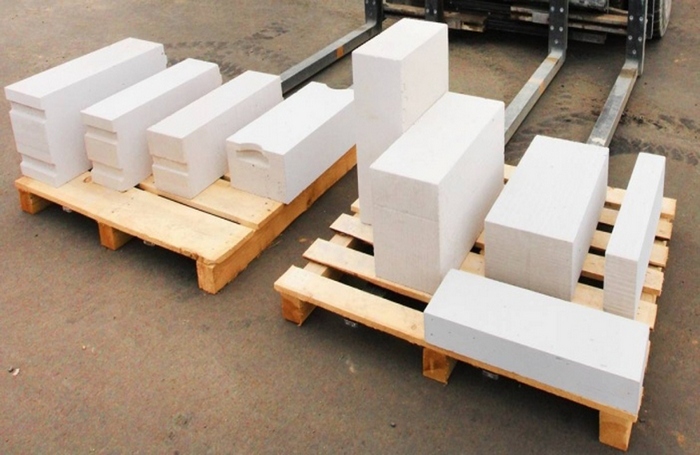
Initially, aerated concrete blocks are formed very large, but they can be cut at the discretion and size of the customer. No less common are ready-made products for masonry - similar to cinder blocks, but only 10 times lighter and sometimes with tongue-and-groove locks.

Lightweight concrete can withstand uniform static loads well and has high compressive strength. But under single-point dynamic influences, it easily crumbles, so critical elements and suspended structures cannot be attached to it.
The advantages of the cellular structure include low thermal conductivity and excellent noise absorption of both structural and airborne nature. You have to pay for this with fairly high water absorption. It would be a mistake to assume that lightweight concrete does not require protection and insulation. In a wall of uniform thickness, condensation forms in the thickness and destroys the structure, so walls made of aerated concrete are not a panacea at all. They are also demanding in terms of installation techniques and need protection like any other building material.
Varieties and varieties
Aerated concrete and foam concrete are often considered as completely different building materials. This is partly true, because different pore-forming substances are used in production. Foam concrete is positioned as a lower quality material due to the use of chemical foaming agents. In fact, the so-called “local” or monolithic foam concrete, which is prepared at a construction site, has deteriorated characteristics, but it is not considered within the scope of this article.

Foam concrete and factory-produced aerated concrete (despite the different technology) can be combined into one class simply because of similar characteristics; good foam concrete is rarely inferior in quality to its main competitor.
Foam concrete and aerated concrete can be autoclaved and naturally dried. The first type is preferable due to the smaller deviation of technical parameters, although in one-story buildings non-autoclaved concrete is used very often and without any special complaints.

All other indicators: density, frost resistance and others like them are specified by the construction project or standard examples of construction.
Foundation for a house
Many people are attracted to aerated concrete because of the opportunity to save on the foundation as one of the most expensive elements. Cellular concrete is indeed lighter (often an order of magnitude) than cinder block or shell rock, however, to impart the required strength, the wall pillar must be wide enough: 35-40 cm for single-story buildings and 45-60 cm for multi-story buildings. The ratio of width to depth, even for shallow foundations, is at least 1:2-1:2.5, so that the structure absorbs the load with an edge, otherwise, when heaving, the foundation will deform even under its own weight.

Among the alternative options, you can consider strengthening the foundation with screw piles or casting a crown - an expander in the upper part of the basement floor. In any case, the foundation should not be made thinner than the wall by more than 30-50 mm, despite the fact that manufacturers of cellular concrete allow an overhang of a third of the wall thickness. Also, an aerated concrete wall must be insulated from the foundation with roofing felt or other rolled waterproofing.
Load-bearing capacity of aerated concrete walls
The ability of lightweight concrete to withstand compressive loads can confidently be called sufficient, but not excessive. In practice, this means that the floor beams cannot rest point-to-point on the wall itself; an armored belt needs to be poured. It should be reinforced, but not necessarily massive. 15-20 cm is enough for roofing or attic and 25-30 cm for interfloor slabs. Beams, if used, can be poured and protected with concrete, although due to the excessive width of the wall, they are often simply covered with blocks.

Floors made of monolithic and stacked slabs do not need to be filled with a preparatory belt. Sometimes, when pouring an interfloor ceiling, a side of thin (8-12 cm) blocks is laid out on the outside of the walls and used as formwork. This solution allows you to support the ceiling quite firmly on the walls and eliminate a very large cold bridge.
Thermal and sound insulation properties
Although foam and aerated concrete have high thermal and sound insulation, it is still necessary to make the wall structure uneven in order to somewhat optimize these properties. For example, enclosing walls are often laid out in two rows, leaving an air gap, due to which the wall will dry naturally.

Aerated concrete walls provide almost no insulation from the inside. To stop excess heat transfer, one layer of rolled insulation up to 10 mm thick is enough. In houses made of aerated concrete, the main thermal insulation is taken outside to bring the dew point into a layer of non-hygroscopic material and protect the wall from blowing. For this purpose, 30-50 mm polyurethane slabs with locks on the edges are used.
Masonry walls made of foam concrete
As for the masonry technique, even amateurs can easily master it. Due to the light weight and large size of the blocks, they can be installed alone and quickly.
The first row is laid out with grade 300 cement mortar on top of rolled waterproofing on the foundation. First, the blocks are installed at the corners, adjusted in a common horizontal plane with a water level, and aligned exactly to the design dimensions using a laser axle builder. After a few hours, the lacing is pulled over the corner stones and the first row is filled. It is carefully leveled with a slatted level and left to dry for a day.

All subsequent rows are laid with vertical joints offset by a third of the length of the block or at least 150 mm. The laying of blocks can be done with reinforcement of every second or third row. When all the walls are driven to a common level, using a special scraper, grooves are cut at the end, one for every 200 mm of wall thickness. The profile reinforcement is bent according to the shape of the grooves, then the grooves are filled with cement mortar grade 300 of liquid consistency and the reinforcing bars are embedded in it. It is optimal if the rods do not break at the corners of the building, but bend with a small radius.

When building with lightweight blocks, it is very important to lay the masonry sequentially and start a new row only if the previous one is completely finished. Before applying the adhesive, the surface of the masonry must be thoroughly cleaned with a trowel and swept away from dust, especially if the previous row is reinforced.

World technical progress provides many interesting building materials. Among them is aerated concrete. This is a type of cellular concrete with small pores that do not communicate with each other. To make it you need cement, quartz sand and special gas generators. Impurities are often used - gypsum, ash, metallurgical slag, lime. This stone is easy to process - drill, saw, plane, drive staples or nails. Over the years it hardens and becomes stronger. It is harmless to health and does not burn. All these properties have made it a sought-after raw material for the construction of private houses.
In contact with
Classmates
The technology of building a house from aerated concrete blocks is simple for a person who has an idea about the construction of structures. The creation of any building (when all permits are already in place) begins with digging a pit for the foundation. The foundation is the basis of any building; it will determine the performance of the building for decades. Ignoring its importance and trying to save money at the stage of its construction is self-sabotage. Even the fact that aerated concrete is lighter than many building materials does not give reason to relax.
Which foundation is better for a house made of aerated concrete?
Factors influencing the choice of foundation:
- geology of the site,
- weight of the building with furniture and all contents,
- landform.
The best way is to turn to experienced specialists for calculations. They will determine all the parameters of the future foundation and its type. Aerated concrete is a fragile material; the slightest subsidence of the foundation will cause cracks to appear. General requirement for the foundation - it must be made of reinforced concrete! Standard designs used for aerated concrete houses:

The most accessible and common type is a shallow shallow foundation. It is suitable for ordinary geological factors; it is possible to make it yourself. The main rule when choosing a foundation is that it must be strong and maintain the rigidity of the entire structure. The technology for pouring a foundation for a house made of aerated concrete is no different from the usual one.
The exact depth can only be determined after geological exploration. But usually it is 1.5 - 2 meters. The width must be 20 cm greater than the width of the wall. The principle works here: you can’t spoil porridge with oil. Much depends on the type of cladding you decide to use. The configuration of the foundation strip must correspond to the contour of the future house and its wall partitions. The thickness of the partitions may be less.
Stages of foundation construction:
- Marking the foundation. We install cast-offs and place the axes of the house on them; for this we hire a surveyor or do it ourselves. Read how to mark the foundation for a house yourself.
- Kopka. We dig a trench of the required depth, which is indicated in the project.
- Pillow. This is a layer of sand 20 centimeters thick, placed directly on the bottom of the pit. It gives the structure special reliability; it is watered and compacted.
- Laying the film. It retains moisture from pouring the solution.
- Reinforcing frame. You can use a mesh made of steel of a certain type. The ideal option is reinforcement fastened with wire. Welding degrades the properties of the metal; it is better to avoid it. Reinforcement has several requirements: the metal should not come out of the foundation; corners and intersections are the most critical points that require the use of solid, bent rods; the larger and heavier the house, the greater the frequency of elements used.
- Formwork and mortar pouring. At this stage, it is important not to forget about possible holes in the project for water supply or sewerage. Install a pipe in that place (you can use an old one). Otherwise, you will have to drill out the hole later. Boards, iron sheets or special forms can be used as formwork. Formwork is reusable equipment. When pouring, it is important to control the composition of the solution. The ideal proportion is 1:3:5. There should be three times less cement than sand and five times less crushed stone. Tamping with a vibrator will improve the properties of the structure.
After pouring, the foundation must settle, set and strengthen. This may take a whole month. A week is enough in the heat. The foundation requires all this time care in the form of moisture and protection from ultraviolet radiation (you can use film). In the cold season, it will take much longer for the foundation to set. It is better to postpone subsequent construction work until spring. Ideally, make a blind area that will remove moisture and precipitation from the foundation.
The technology of laying walls from aerated concrete blocks is not a difficult task. Particular importance should be given to the bottom row, because it will determine the “evenness” of all other rows. It is recommended to lay waterproofing between the plinth and the bottom row. This can be bitumen material in rolls or special mixtures. If the upper plane of the foundation is curved, it is necessary to eliminate this defect by making a leveling layer of sand-cement mortar.
Ideal block geometry  Allows installation with adhesive. It's cheaper than a solution. But it requires more precise placement of the blocks themselves. It will not be possible to correct the location of the block with a layer of cement. If after laying the last block there is still space in the row, then it is necessary to make an auxiliary block. During installation, its ends should be coated with glue on both sides. Control the installation of each block with a plumb line and level. You can adjust the positions of the blocks with a mallet. When laying each new level, level the surface of the bottom row with a float. There should be no gaps between the blocks; they must be on the same level. Dust should be swept away or blown away. Advantages of using glue:
- saving effort and materials,
- improvement of thermal conductivity,
- perfect geometry,
- compressive and bending strength.
The vertical bar will help determine the angle, and the cord will help determine the parallelism of the rows. Don’t forget about the principle of bonding when laying each new level. The center of the block should be at the level of the junction of the blocks of the row below it. Follow the drawing: you may have to leave an opening in the wall for pipes or ventilation.
Wall reinforcement

Reinforcing walls made of aerated concrete does not increase the load-bearing qualities. But it reduces the likelihood of cracks appearing. The issue of reinforcement must be considered in each individual case. It is advisable to do reinforcement for the initial row of masonry and for every fourth row. It is important to use reinforcement at the support points of the lintels, under the window openings. Each row of flooring and the row under the rafter beam should also be reinforced. To lay reinforcing bars, grooves must be cut into the masonry cavity. A wall chaser will help.
First, remove the dust, then fill the grooves with glue or cement mortar. This will strengthen the structure and save the reinforcement from destruction. The best option is rods with a radius of 4 mm. For thin seams, special reinforcement cages can be used. They look like parallel strips made of galvanized steel. The strips have a cross-sectional size of 1.45 mm and are connected with a snake-shaped wire.
Reinforcement of aerated concrete partitions is performed when the partition structure is higher than 3 meters, especially in seismic areas. Particular attention is paid to reinforcement in areas of partitions above doorways. First, a board is laid in the opening, then cement mortar and reinforced mesh. The reinforcement must exceed the size of the opening by 30 cm.
The connection between the wall and the partition is carried out using anchor plates, dowels and self-tapping screws. After finishing the masonry, the partitions and vertical joints are filled with polyurethane foam and rubbed with mortar. An ideally laid partition made of aerated concrete blocks can be puttyed immediately, skipping the plaster. This again confirms the advantage of blocks.
Wall covering
Covering walls made of aerated concrete is fundamentally no different from other structures. In houses made of aerated concrete, 4 types of floors are used: 
- Prefabricated monolithic.
- Reinforced concrete slabs. They are installed in extreme cases, if the span is more than 6 m. The large mass of these slabs limits their use in such construction.
- Aerated concrete slabs. They come in lengths from 1.75 to 6 m. Their weight is much less than conventional slabs. But sound insulation and thermal conductivity are better! And the small thickness does not reduce strength. But installation will require a crane.
- Beam.
The edges of the slabs should extend onto the main, load-bearing walls at a distance of more than 12 cm. But they should not lie and put pressure on the internal partitions. They are deliberately built a little lower. The floors are tied using clamps. The technological gap is filled with reinforcement and sealed with cement mortar. Very often, when building a small private house, floors are made of wood using timber and boards.
Wall insulation

For residents in latitudes with warm winters, insulating a house made of aerated concrete is pointless. The feasibility of this work is influenced by the thickness and design of the seams between the blocks, and the parameters of the blocks themselves. If they are laid on a thick layer of cement mortar, insulation is required. If the seams between the blocks are minimal, insulation can be omitted. If the block is made of very dense material, or the wall thickness is less than 30 cm, insulation is required!
Many craftsmen do not recommend insulating this material at all. It belongs to the category of “breathable”. And insulation will contribute to the opposite effect. The vapor permeability of the insulation must be higher than that of aerated concrete. Otherwise, you will have to install special ventilation. Often insulation gives a more beautiful appearance to the structure. The materials used are polystyrene foam and mineral wool. A thickness of 5 centimeters will be enough.
When insulating walls made of aerated concrete, it is important to follow the principle: the vapor permeability of materials should be from a lower level in the room to a higher level outside. The best option is insulation from the outside. When a building is insulated from the inside, the dew point shifts, moisture will begin to accumulate in the room, and mold and mildew will appear.
The decision to build a house from foam concrete is welcome. The many advantages of this material will make your home comfortable and well-made. Try to get a lot of useful information that will facilitate the construction process and make it less expensive. Check and calculate everything, analyze and think. If the work is carried out by hired workers, try to delve into the process, record deviations from the plan, and do not hesitate to ask questions: “Why is this so?”
Construction of a house from aerated concrete blocks: video.
Watch step-by-step video instructions for building houses from aerated concrete:
In contact with
We will build a turnkey house from aerated concrete in Moscow and the Moscow region from 14,000 rubles per meter. This price includes a gas silicate block, foundation, walls, roofing, screed. Building a house from aerated concrete on a turnkey basis is an ideal option for people who dream of owning their own home and who do not want to find a hole in their wallet after construction. Construction technology from this material makes it possible to erect a reliable structure in a relatively short period of time. The SVS construction company has been building turnkey houses from aerated concrete in Moscow and the region for over a decade. We have successfully implemented hundreds of projects, as evidenced by positive customer reviews.
Advantages of building a house from gas silicate
- Durability and structural strength
- Light weight, reduced load on the foundation
- High degree of fire protection
- Environmental safety of the material
- Wide architectural possibilities
- Immunity to rotting and microorganisms
- Good thermal insulation properties
Disadvantages of building a house from gas silicate
- A large amount of low-quality material, the risk of getting defective
- The need for external façade finishing
- Tendency to saturate with moisture (hygroscopicity), the need to constantly heat the house
If you decide to build a house from aerated concrete with us, you can be sure of 100% quality. SVS specialists pay especially close attention to compliance with technology, SNPs and GOSTs. We:
- We thoroughly study the soils in order to correctly calculate the foundation for a house made of aerated concrete;
- We accurately calculate the load on the foundation of the house, which allows you to choose the optimal technology for pouring the foundation and construction;
- We use our own professional formwork for the foundation;
- be sure to fill the armored belt in a house made of aerated concrete;
- we place the blocks on special glue, which increases the heat capacity and makes the appearance more aesthetic, compared to using a regular solution;
- We use autoclaved aerated concrete. The soundproofing properties of the material made using this technology are ten times superior to brick.
It is worth noting that during the construction of housing the cost of work does not change. Risks associated.
The cost of building houses from aerated concrete is from 15,000 rubles m²
The cost of a house made of aerated concrete - price in Moscow and the region
The cost of building a house from aerated concrete in Moscow and the region varies greatly among different construction companies. It depends not only on the quality of the work performed, but also on the image of the construction team, the availability of appropriate licenses, permits, and their own machinery and equipment. The SVS company offers to build a turnkey aerated concrete house inexpensively. We achieved a reduction in cost relative to our competitors due to the complete rejection of subcontracting and rent.
The cost of individual design is 250 rubles per 1 sq. m. meter.
When building a house with our company, the design is free of charge
At the SVS company, the price of building a turnkey aerated concrete house varies. It starts from 14 thousand rubles and reaches 23 thousand. This indicator is influenced by the complexity of the work and the materials used. By deciding to entrust the construction of a turnkey aerated concrete house in Moscow and the region to the construction company SVS, you will receive unsurpassed quality, an officially concluded contract, total control over the construction site, including online monitoring.
A house made of gas silicate blocks will be an excellent solution for those who want to build a home with their own hands. The popularity of this material in the construction industry is explained by the fact that gas silicate has unique properties and characteristics. Therefore, building a house using such blocks allows you to save money and get a safe and durable structure.
Advantages of gas silicate
Building a house with your own hands using gas silicate as the main material has the following advantages:
- efficiency;
- environmental friendliness;
- fire resistance;
- soundproofing;
- thermal insulation;
- frost resistance;
- ease;
- ease of use.
The main advantage of gas silicate is the relatively low price for the material, which makes building a house from gas silicate blocks cheaper than from brick. These blocks have good thermal insulation and help to better insulate a home than other building materials. The porous structure gives them high sound insulation properties.
Gas silicate has excellent vapor permeability and does not accumulate steam and moisture indoors, but removes it outside. In the event of a fire, the material does not burn and only slowly melts, since it consists of non-combustible elements. Since it is much lighter than standard concrete, such a building will not need a solid foundation and will save on the foundation. Only natural materials are used in the manufacture of blocks: aluminum powder, lime, quartz sand, cement and water. During construction, you also don’t have to worry about harmful fumes.
Foreman's advice: when building a house with gas silicate blocks, the walls will settle within one year, therefore, in order to avoid the formation of cracks, it is not advisable to use plaster for interior decoration.
Features of building a house from gas silicate
To build a house with your own hands, products with a tongue and groove are usually used, which will help save on adhesive composition and ensure even lines. As shown, built from gas silicate, the most popular option is considered to be blocks with a density of at least D500.
You can build a house on weak-bearing soil without necessarily installing a strong foundation, so a shallow strip foundation may be the optimal solution. In this case, it is necessary to accurately observe the dimensions. The first installation should be carried out on a durable waterproofing layer in order to avoid moisture entering the cavity of the gas silicate block. It is advisable to use a cement solution or special glue as a bond. It is recommended to design window and door openings using gas silicate lintels, which will be similar in size to the main block.

Construction stages
It will not be difficult to build a house with your own hands if you make calculations in advance and carry out all stages of construction clearly according to plan:
- laying the foundation;
- waterproofing;
- main row;
- subsequent rows;
- wall reinforcement;
- installing lintels in window and door openings;
- overlap
To build a house, a reinforced concrete slab is suitable as a foundation. It can be replaced with a monolithic strip foundation on a sand cushion. You can check its horizontality using a hydraulic level or a level. If there are differences of more than 20 mm, you will need to level the foundation to simplify the process of laying walls. After establishing the base, waterproofing is carried out from a double layer of roofing material. If this is not done, then mold may appear on the walls and there will be increased dampness and humidity in the house itself.
It is recommended to lay the first rows of gas silicate blocks on a cement-sand mortar to smooth out unevenness and level the first row horizontally. The blocks begin to be laid in the corners, after which a rope is stretched between them, along which the entire row will be laid out. The evenness of subsequent rows will depend on the correct placement of the first row.
The following rows can be laid with a special glue, which is applied with a trowel. It is very important to remove dust from the surface of the block in advance. Glue is applied to the surface of the wall on which the next block will be installed and to the end part of the previous one. Alignment is carried out horizontally and vertically, and the seam of the previous block should be in the center of the product being laid. Lightly tapping the end with a rubber mallet will help to press them together.

Every fourth row of blocks must be reinforced with fiberglass and metal reinforcement. The reinforcement takes on bending loads and prevents the walls from moving apart. To do this, a groove is cut at the top of the gas silicate either manually or using an electric wall cutter. Glue is half-filled inside the grooves, and reinforcing rods are installed. Reinforcement breaks in rows should not intersect to ensure greater structural reliability.
For openings no more than 1.5 m wide, metal corners are used on which the blocks are laid. Cuts of the required size are made in the surface of the gas silicate block to prevent differences in height. The corners must first be treated with a special anti-corrosion substance.


If there is an opening wider than 1.5 m, a reinforced concrete lintel with a height of at least 20 cm is poured. Before pouring concrete, it is necessary to install formwork of a suitable size and shape and lay a reinforcement frame in it. At the end, the ceiling is installed, which can be wooden or monolithic. Under the Mauerlat you will need to install a reinforcing belt with a thickness of at least 10 cm. Formwork is prepared for it from durable plywood or boards. Reinforcement is performed with metal rods, which should be installed in the thickness of the concrete, but not on the blocks themselves.
Building a house with your own hands from gas silicate blocks will not be difficult if you take all measurements correctly, use only high-quality materials in construction and strictly follow all stages.
Video
Gas silicate blocks have long and firmly begun to compete with standard bricks, providing the craftsman with high quality construction, its reliability and durability. And the reason for this is the undeniable advantages of the material. A house made of gas silicate blocks can be built quickly with your own hands and does not require much labor. That is, a master can lay silicate blocks with one hand.
We will discuss below how to build a cottage from gas silicate material, what nuances in the work should be taken into account and what actually are the pros and cons of this building material.
Advantages and disadvantages of gas silicate blocks
Gas-silica blocks have many advantages over standard bricks. The material also has its drawbacks, but with the right approach, all the nuances can be resolved.
So, gas silicate blocks have the following advantages:
- Light weight. The material is several times lighter than a standard concrete block, and one gas silicate brick replaces 22 standard bricks in weight and density. And their mass in this quantity is 100 kg. As a result, your house built from gas silicate (as well as from aerated concrete) will have less weight. This, in turn, has a beneficial effect on the construction of the foundation, which may well be a pile or shallow strip foundation.
- High thermal insulation properties. Thanks to the porous structure of the material, aerated concrete (gas silicate) perfectly retains heat and transfers it to the home. So, in comparison with brick, whose thermal conductivity is 0.87, gas silicate has a thermal conductivity of only 0.12.
- Ability to store and release heat. Thus, gas silicate blocks carefully store heat in the winter, and remain cool in the summer without being subject to excessive overheating.
- Soundproofing. The walls of a house made of gas silicate are able to perfectly muffle noise from the outside, similar to a three-chamber double-glazed window, with their standard thickness and in the presence of finishing plaster. The noise level attenuated from the street reaches 65 dB. In such a house it will be quiet and cozy.
- Material strength. Gas silicate blocks can withstand compression loads very well, making the material ideal for building a country house.
- Frost resistance of blocks. Note that gas silicate can withstand multiple cycles (2 times more than the usual refractory or sand-lime brick) of freezing and defrosting without any external or internal damage to the structure.
- Environmental friendliness of the material. Since only organic materials (sand, cement, lime, water and aluminum paste) are used for the production of gas silicate, the blocks are absolutely environmentally friendly.
- Fire resistance of blocks. Gas silicate can withstand up to three hours of fire, provided it is directed directly. This property is due to the use of non-combustible raw materials for the production of blocks.
The disadvantages of gas silicate material include:
- The presence of a porous structure, which leads to the formation of fungus on the blocks if they get wet. The issue can be resolved by properly storing the blocks on the construction site and using external breathable plaster.
Important: gas silicate should be stored only on factory pallets and under film, and preferably under an additional canopy. Batches of blocks are flattened only as needed.
- For any finishing work on gas silicate, you will have to use special chemical anchors instead of standard ones;
- The construction of houses from gas silicate blocks is relevant either on a strip foundation or on a monolithic slab foundation;
- The price of the material is slightly higher than the usual brick. But given the size of the blocks, we can safely say that the cost of construction will ultimately be profitable.
- Due to poor tensile strength, an armored belt should be laid around the entire perimeter of a gas silicate building.
Important: assessing all the positive and negative aspects of the raw material (technical characteristics, price, etc.), you can give preference to this material and build a house from gas silicate with your own hands.
Types of gas silicate blocks and their calculation
To build a house from gas silicate blocks, you must first choose the right type of blocks, since they are available in different sizes and densities. The following grades of material with appropriate markings are offered on the construction market (each number in the marking means the density of the gas silicate block in km/m3):
- Blocks D Here the thermal conductivity of the material is W/m °C. This type of material is best used for external insulation of a house or installation of ceilings.
- D400 blocks have a thermal conductivity of 0.096 W/m °C. This type of blocks is also recommended for insulation and installation of floors.
- Blocks D Thermal conductivity here is 0.12 W/m °C. These gas silicate blocks can already be used in laying the external walls of a house without subsequent insulation.
- Gas silicate D The level of thermal conductivity in this case is already 0.14 W/m °C. Suitable for the construction of houses without mandatory thermal insulation on the outside.
Important: the wall thickness for such a gas silicate block should be thicker than standard.
- Blocks D 700. Have a thermal conductivity of 0.16 W/m °C. Most often, this type of material is used for the construction of load-bearing walls and partitions in the structure of a house. It can also be used for laying the external walls of a building, but subject to mandatory additional insulation.
- Blocks marked 200-300 - used as external insulation or exterior finishing;
- Blocks 400-600 - suitable for the construction of one-story buildings, and this material can be used for both external and internal load-bearing walls;
- Blocks 500-700 - more often used in the construction of buildings from 2 to 3 floors or buildings with a complex structure (attic, balconies, etc.);
- Blocks 700 - recommended for use under an armored belt.
As for the amount of building material, it can be calculated in cubic meters by multiplying the parameters of the future house according to the design documentation. That is, the width and length of the house, the thickness of the block and the height of the walls are multiplied. The resulting value is the amount of gas silicate per m3.
Important: a special online calculator will help simplify the calculation task, into which you just need to enter all the initial data for the house. In this case, building a house will be as economical as possible if the calculations are carried out correctly. The price of construction will also be visible here if the data is entered correctly.
Let's start construction: foundation

To properly build a house from gas silicate, you need to lay a reliable foundation. For a house of this type, the ideal options are a strip shallow foundation (provided the soil on the site is not heaving) or a slab monolithic foundation. The second has a higher price, but at the same time it can easily withstand the load of the house in case of heaving soil at a construction site. Such a foundation will simply maneuver in the ground, protecting the house from soil pressure from all sides. As a result, the house will remain safe and sound.
Both types of foundations are poured from prepared concrete mixture. To prepare it, use cement of a grade not lower than M-200, sand and crushed stone. The ratio of bulk materials is 1:2:2.5. All ingredients are diluted with water to obtain a mixture of medium consistency (like thick sour cream).
The resulting mixture is poured into pre-assembled formwork in a prepared pit or trench.
Important: to properly install the foundation, it is necessary to lay a sand and gravel cushion at the bottom of the trench/pit, and then lay a layer of waterproofing.
Foundations of both types must be reinforced with steel rods with a cross-section of 8-12 mm. It is necessary to knit a mesh from them, which will additionally strengthen the hardening concrete and make the base strong and durable.
Important: when pouring the solution, it is necessary to compact the mixture well using a construction vibrator, but without touching the reinforcement. This way, all air bubbles will come out of the concrete, and the foundation will have better density, which will have a positive effect on its strength and solidity.
The finished base is left to dry completely for about a month. After the concrete has completely dried, the foundation should be waterproofed on all sides.
Wall masonry

This section will be especially interesting to those craftsmen who do not know how to properly build a house from gas silicate blocks. Since masonry walls made of gas silicate blocks have several features:
- Thus, the installation of blocks must be carried out exclusively with an adhesive mixture. If the construction of a house is carried out in winter, it is necessary to purchase a special winter version of the mixture.
- It is worth considering that blocks at a construction site should be stored exclusively on factory pallets and wrapped in factory film. This will protect the blocks from excess moisture. You need to unroll the gas silicate as needed for laying block walls.
- If external wall decoration is not provided, then care must be taken to decorate the seams. To do this, they pass through them with a special decorative groove, picking up excess adhesive mixture.
- It is tedious to start laying the first row (as well as all subsequent ones) from the corners. Moreover, if the foundation is not completely level, then the blocks begin to be laid from the highest angle.
Important: it is worth remembering that the first row of blocks is laid only on a cement-sand mixture.
- The blocks placed in the corner are leveled. Then they lay the blocks in all other corners of the house and also level them. A control cord is pulled between the laid gas silicates, along which the evenness of the masonry will be varied.
- Gas silicate is placed according to the principle of a sling, moving each upper block to the side relative to the vertical seam by 8-10 cm. This also applies to the corners of the house.
- The adhesive mass is applied with a special carriage, carefully leveling it.
- The masonry walls must be reinforced with steel rods. They must be laid on the first row of masonry, on every fourth row, in all door and window openings, as well as in places of increased load on the house. To install the armored belt directly in the laid row of blocks, grooves are formed and reinforcement is placed in them.
- If the openings are more than 1.5 meters long, then it is necessary to pour a special concrete belt. It needs to be insulated when pouring so that cold bridges do not form.
- The last row of masonry is tied together with a monolithic concrete belt, on which the floor slabs are then laid.
Roof

If you need a house made of turnkey blocks, all that remains is to install the roof and install all communications. The roofing is done by attaching the rafters and filing the sheathing to them. Additionally, the roof is sheathed with rough boards, which are then covered with thermal and waterproofing. Ondulin can be used as a roofing material, which can withstand temperature changes, moisture and sunlight.
When making, the finished house can be finished on the outside with decorative “breathable” plaster or siding. Houses made from gas silicate are not only strong and reliable, but also quite beautiful, which satisfies the aesthetic taste of the owners.
Video: how to build a house from gas silicate blocks: